 Just a quick post for the latest cake. This occasion; my wonderful grandfather's birthday! This one was a small square 2-layer vanilla cake with vanilla buttercream and a layer of raspberry jam. I covered the cake in light blue fondant & the theme of the cake was a crossword, given his love of puzzles! The Happy Birthday message was displayed as words in the crossword, and had the added decorations of a fondant pencil and rubber. The finishing touch to the cake was a border to the bottom of the cake. Having recently purchased a sugar craft gun, this was my first opportunity to test it! I made two strips of different strengths of blue, and twisted for a two-tone rope affect for the border.
Tuesday, March 26, 2013
Happy Birthday Grandad!
Just a quick post for the latest cake. This occasion; my wonderful grandfather's birthday! This one was a small square 2-layer vanilla cake with vanilla buttercream and a layer of raspberry jam. I covered the cake in light blue fondant & the theme of the cake was a crossword, given his love of puzzles! The Happy Birthday message was displayed as words in the crossword, and had the added decorations of a fondant pencil and rubber. The finishing touch to the cake was a border to the bottom of the cake. Having recently purchased a sugar craft gun, this was my first opportunity to test it! I made two strips of different strengths of blue, and twisted for a two-tone rope affect for the border.Sunday, March 24, 2013
Good Luck in Australia Cake!

Wednesday, March 20, 2013
Watch This Space!
Just a brief post with a snap of some of the decorations due to go on the next cake! Check back at the weekend for photos of the finished cake! Excited about this one!


Tuesday, March 19, 2013
Happy 21st Birthday to Trevor
 Time for an up to date post! I had an order last week for a 21st birthday cake, to be in the shape of a USB stick. I like to plan and know what I am going to do ahead of time! Therefore a lot of thought and preparation was done before starting this cake! Also, seeing as it was a 21st birthday cake, I wanted to do a good job...no pressure!
First off, the cake was a 2-layer chocolate cake with chocolate buttercream. The cake itself was in two parts; the USB key and the lid. The Cake was covered in red fondant (M&B), with detail and decoration in white and black, and silver paint for the metal piece. So far with cakes, I have used the FMM Funky Alphabet or small metal alphabet cutters I have. I used the FMM ones for the birthday message on the cake board. For the name on the USB itself, I needed a plain font, and without an appropriate cutter, it was back to hand cut letters! Worked out nicely! The 21GB was requested as a reference to the birthday that it was and I used the small letter cutters for this. The USB symbol was also made by hand. I also made the '21' on the lid from fondant, as another celebration of the 21st birthday!
Happy Valentine's Day!

 Just a short note on some Valentine's Day baking! I'll take any excuse to bake, and it's even better with new equipment to use! This time...heart shaped cutters, as well as a little experimenting piping roses with the 1M nozzle...didn't turn out too bad for a first go! In-keeping with the Valentine's theme, I went with Red Velvet cake. The frosting was cream cheese frosting, in original cream and a deep rose pink. Some of the cupcakes were decorated with fondant hearts, while the rest were sprinkled with edible pearls and mini hearts. As well as the cupcakes, I made a small single layer cake, and had a go at making a heart with three piped roses.
It's iPhone Time!
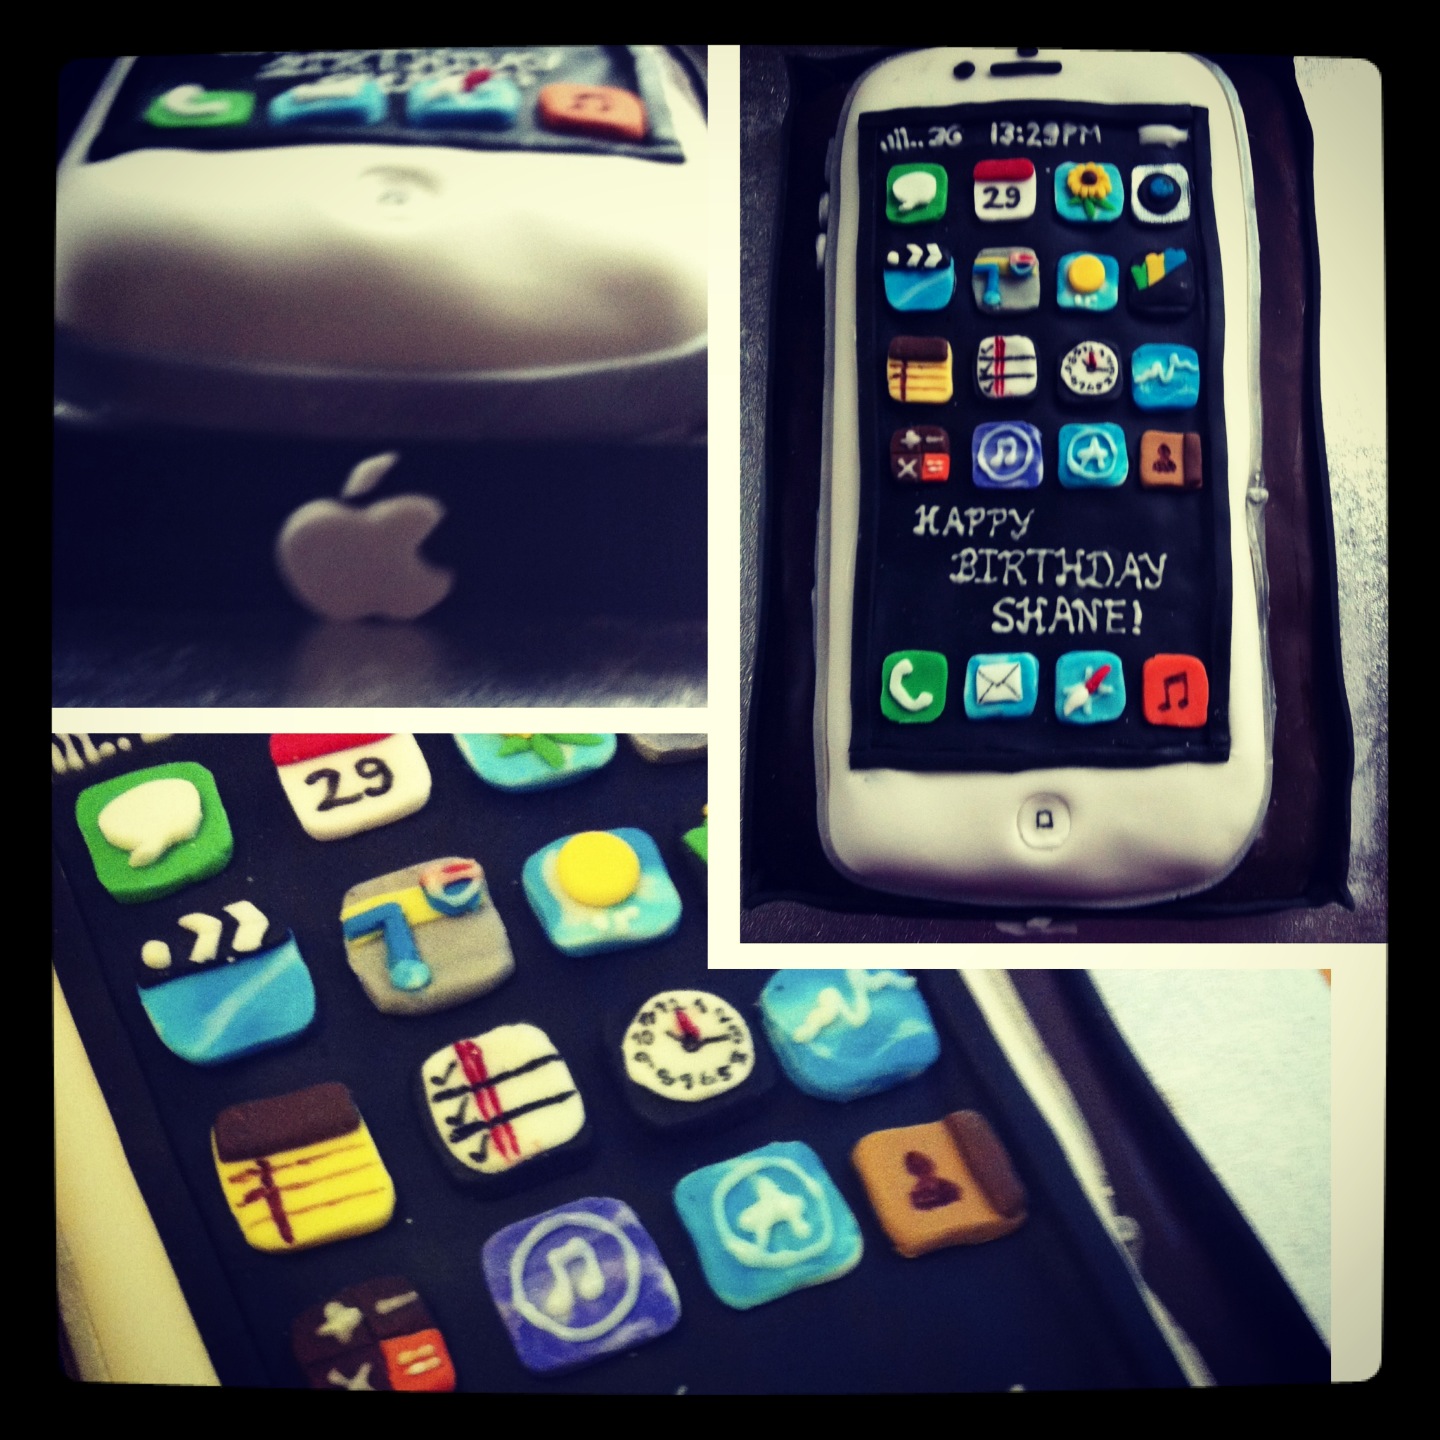
I used Red Velvet for the sponge, with a short single layer at the bottom for the box. The phone itself was another slightly smaller layer of sponge. First up on the list was the icons! I made them all by hand with fondant, without a cutter for the base shape! It was a lengthy process but worth it in the end. Each of the icons was just bigger than a 2 cent coin so getting the detail on them was a challenge! Having said all that, it was actually the most enjoyable part of making the cake! The phone was covered in white fondant, with a black insert for the screen, along with a silver strip for the rim around the cake. To finish off, I added a white Apple logo to the end of the box. Definitely one of the most enjoyable cakes to make!
Birthdays Galore!
 First up is the most recent cupcakes as a birthday gift for a friend of mine! The textured mats, Blossom mould and buttercream were used to decorate these ones.
Next... a pre-Christmas order of birthday cupcakes... mixed box of Red Velvet, Lemon Curd and Chocolate!
Having finally purchased a set of textured sheets over Christmas; 6 Floral patterns from Autumn Carpenter. I was really excited to text them out and finally got to for a couple of birthday orders in January & February! I wanted to go with a girly theme but keeping the colours pastel for a soft finish. As well as the textured mats, I also used the Blossom Sugar Art Hydrangea Cutter & Mould and PME Sunflower plunger cutter for some decorations. For some shimmer and shine I also used Mother of Pearl dust.
January and February are a birthday-filled time in my family! For a joint occasion, and as per a request, I did some experimenting with the cupcakes! Two flavours up this time were Caramel and Corona Lime. Using Carnation Caramel as an addition to the buttercream for the caramel cupcakes makes the buttercream quite loose so there's a balancing act to be done between the caramel and icing sugar! The corona lime cupcakes turned out well, and the flavour of the Corona baked in the sponge seemed strong enough, so I opted not to add it in a syrup to the baked cupcakes. There is definitely some work to be done for the frosting for these cupcakes. It uses a cream cheese base which will itself make a looser buttercream. With the addition of lime juice, this was not a buttercream stiff enough to hold a swirl pattern! The buttercream tastes cream and looks good without a star piping effect, but for transportation purposes especially some adapting should be done for a stiffer frosting!
Monday, March 18, 2013
Last of the Christmas '12 Updates!


 Final Christmas update comes with a Christmas themed cake made with chocolate biscuit cake. Of all the creations over Christmas, this was probably the most enjoyable, in particular getting to make the cake toppers! The cake itself was a 9x13" sheet of chocolate biscuit cake, with Rich Tea and Digestive biscuits, milk and dark chocolate, butter and golden syrup. Once the cake had set in the fridge for a few hours it was coated on top with a thin layer of chocolate to even it out and allowed to set again. Once completely chilled it was time to have fun with the decoration! I surrounded the sides of the cake with a mix of chocolate fingers and dusted it for a snow effect. I had made the cake toppers the day before so they just had to be put in position! For the snowman, made from fondant, it was supported with a wooden skewer through the center, and decorated with a fondant hat and scarf. The reindeer was probably the most fun part of this cake to make, and he turned out really cute! As with the snowman, he is supported with a wooden skewer, as well as two skewer pieces to attach the antlers. The four corners of the cake were decorated with some handmade candy canes. One of the Christmas trees was made from a cone shaped piece of fondant, snipped with a small scissors to give the leaf effect. The other was made from stacking fondant snowflakes. Lastly, I used FMM Funky Tappits to display the 'Merry Christmas' message!
It's Been a While!!
Wow...it's been a while since I've posted! Time to do some backdating and post some of the adventures from the last few months! I know it's March, and Christmas is long gone, but seeing as the last post was in December, I'm going to have to start there! So first up I'll share some of the Christmas creations! After the fun at the market in November/December, there was time for a few Christmas orders before the holidays! Most of these were for Christmas cupcakes, seen below, topped off with some fondant Santas, snowflakes, candy canes and holly.

 St. Catherine's National School in Bishopstown was holding a Christmas raffle before the break. This was a nice chance for me to have some fun with the Wilton Christmas tree cutters I had recently purchased, and donating the finished product to the raffle at the school I attended as a child! Below is the finished product, with 18 star-shaped cookies, reducing in size, stacked on top of each other, and topped off with the typical Christmas star! I used a grass tip nozzle with royal icing for the greenery, with a range of coloured dots to light up the tree! To finish it off, the tree was wrapped in clear cellophane and tied with a gold bow!


Subscribe to:
Comments (Atom)